Sunday 30 December 2012

Top 5 of 2012 - Reflections, Inspirations and Goals


Top 5 of 2012
Carrying on with Gillian of Crafting a Rainbow's 2012 wrap up, the reflections, inspirations and goals really made me think.

Reflections

1. I love sewing! 
I always used to like it a lot, now I am doing it more and better than ever and I love it, the more I do it, the more I love it.  I love the time with just me and my machine, I love the process of making two dimensional fabric into a curvy, shaped garment, I love the creative process of putting a garment together and making it my own.

2. Slow Sewing
When I was a teenager and in my early 20s before I had a serious job or needed sleep, I used to start making a garment in the afternoon and have it finished to wear the next day.  However looking back most of these were rush jobs and were lacking in quality or detail.  Now I would rather take longer to finish a garment and be happier with the finished product.

3. A New Love of Clothing
For the past few years I haven't spent much time sewing and as a consequence had to go to the stores and purchase RTW. This is usually a traumatic experience with many hours spent trawling through the shops trying to find something that kind of fits that I would settle with. Now I can be happy with a garment, the fit, the colour and the design.  I also love having clothing that no-one else has. I love to go out and know that I won't run into someone wearing the same thing. I also like that I have my own style and that I can express it

4. Confidence
Making my own clothes and blogging them has given me more confidence in myself and with my shape.  I no longer have to fit into a specific size dictated by a store.  My small shoulders, larger bust and shortness are no longer of consequence! 

5. Support
My hubby is super supportive of my hobby and gives me the time and space when I need it. For this (and so many other reasons) I love him dearly.

IMG_0487

Inspirations

Other bloggers have really helped keep me motivated to take care of the quality of the garment and the fit.  I don't want to post up items I am not happy with, so you bloggers out there keep me pushing myself to make better and better garments. I also like seeing people with a similar shape to me as it helps me find patterns to suit me that I might not otherwise try.  I can't narrow it down to five as there are so many bloggers I love, maybe just check the blogroll to the right as I can't even name a few for fear of missing someone!

Independent pattern makers - Colette, Sewaholic and Megan Nielsen are my favourites, but I am sure that there are many others I haven't discovered yet! When I previously sewed more I always used to get frustrated that the big companies didn't have patterns that I liked, the independent pattern makers really seem to be addressing the demand for what is needed. I seem to gravitate towards these more than the Big 4.

Goals for 2013

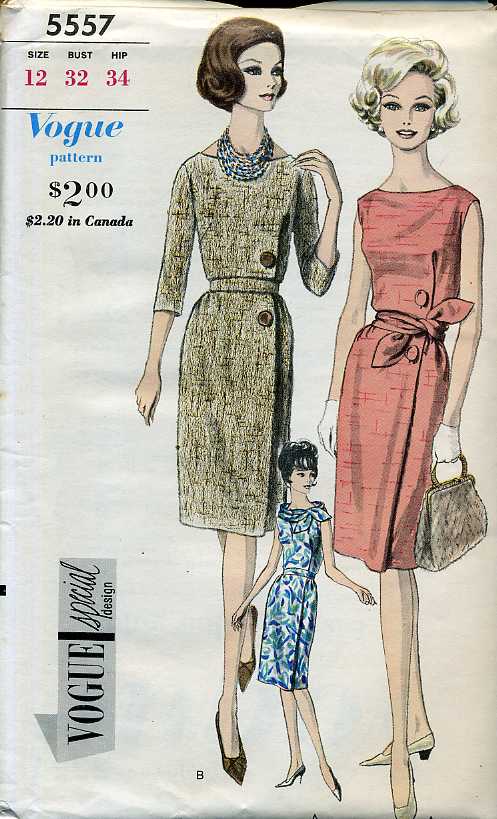
1. Make more of my vintage patterns, I have a great stash just waiting to be used
2. Make muslins more often to guarantee a better fit
3. Organise and catalogue my patterns
4. Really take time to think through my makes...will the pattern suit me? will I wear it? is it the right fabric for the garment? what do I need in my wardrobe?
5. Make a fun or "frosting" garment - it is always fun to have some frosting!

Wow - that's my wrap up for 2012.  I am looking forward to a productive 2013!


Wednesday 26 December 2012

Top 5 of 2012 - and now the Misses

Top 5 of 2012

The year was not all roses for me sewing-wise unfortunately and this post is to share my misses.  Yep I am far from perfect and the same for some of my projects. 

In order of worst to best:

1.  This attempt to make a 1940's pattern from an Australian Home Journal - it was all good until I added the skirt.  Then it was so awful that it ended up balled in a corner for two months before being cut up and made into this top.  I love the replacement but will have to give the pattern another go as I won't let it beat me!!

 
2. Flowery, Girly dress - the fit on this is not great. In my defence at the time I was not really reading or following any blogs, if I had I would have known that loads of people had issues with this pattern and might have made a muslin. *sigh* live and learn.
 
 
3.  My first item I blogged about. I did like the jacket when I first made it and I still think it's...ok, but I am not loving the sleeves.  I may refashion it and narrow the sleeves to look a bit more normal.
 
 
4. Colette Violet - I never wear this blouse, it just feels too boxy and a bit short.  Again, just not feeling the love.  Plus the collar seems huge and it is too big across the shoulders.  Seriously thinking of refashioning it as I hate things to gather dust in my wardrobe.
 
 
5.  The Turnaround Blouse - another top I just don't wear.  Not really sure the reason, I guess I feel it is not that flattering, plus I didn't have a decent skirt to wear with it. Now I do, but it is the wrong season, perhaps next season?  I do really like the fabric so perhaps just need to find a way to wear it in 2013.
 

So what have I learnt from the above:
- make a muslin more often, especially for vintage patterns
- take care to adjust the pattern to fit i.e. different sizes for shoulders, bust & hips, consider FBA
- think about the pattern more and whether it will suit my shape
- it doesn't matter too much, if I don't like it, it can always be hacked or donated!
 
What are your fails for the year?  Please share and make me feel better!!


Sunday 23 December 2012

Top 5 of 2012 - The Hits

Top 5 of 2012

Gillian of Crafting a Rainbow had this great idea to post up a bit of a summary of 2012.  What a great idea to review how my sewing has evolved over the past 12 months.

I only started blogging at the end of April this year, the blogging originally started as a way for me to document what I was doing and how I was progressing, but as a result I have met (virtually of course) an amazing bunch of bloggers and readers that are so supportive and friendly - so thank you all!

I have been sewing for many, many years although with many a break too as life got in the way at various times. This time around I seem to be taking it more seriously and making more of an effort with each garment.  Previously I didn't take much time to alter the pattern, I used to cut the pattern larger than needed and then took in various seams as required.  Now, I make the effort to cut smaller shoulders, do an FBA and anything else required to get a better fit. Of course this has resulted in garments I am much happier with and that I wear!

So starting with my favourite garments of the year in no particular order and not including a couple still to be photographed and blogged (these will possibly feature in next year's round up) .

1. My cotton shirt-dress, this is so comfortable and I wear it all the time.  It is great to wear to the office with some nice wedges, or to the mall with ballet flats.

IMG_0840

2.  Then we have my vintage pattern blue dress made to wear to a wedding earlier this year.  I got loads of great comments like "Really, you made it? That's amazing. I wish I could sew." Funny isn't it, I am pretty sure most people could sew if they really wanted to learn.

  IMG_0258

 3. Kelly Skirt - I love this skirt, it is so versatile, dressy and casual depending on what I wear it with. Just a great wardrobe basic. Nuff said!

IMG_0948
  
4. This photograph does not do this Banksia top or fabric nearly as much justice as it deserves, however this is a great top, it gets so much wear.  Made out of Marc Jacobs fabric from Mood in NYC, it is cool, comfortable and pretty. LOVE!

 
IMG_0714
 
5. My Got the Blues jacket.  Of course made to wear with the dress above, however it goes with jeans as well, in fact it goes with lots of things.  I don't probably wear it as much as I would like, but I love the fit, the construction and the cute polka dot lining
 
 
Aside from these made for me items, I recently made these aprons as Christmas presents and the joy I got from giving these was fabulous.  I made these for a friend of mine and her two daughters aged 4 and 2. They love to bake together and they went down a treat.  I made the children's aprons with elastic around the neck and a velcro closure around the waist with the intent that they should be able to dress themselves.  On opening their presents, the kids put them on and started chanting "we match, we match!"  Yay - this is the kind of me-made present I like, one that is really appreciated!!
 
A-eJa3HCQAA3ZBu
 
In the next couple of day I will post up the misses and my goals for 2013, but in the meantime, Happy Holidays!

Wednesday 19 December 2012

Floral Sorbetto

OK not very imaginatively named I know.  Not really my forte coming up with fabulous names for garments, but here it is nonetheless, my floral Sorbetto.

IMG_1111

First of all, this was a stupid day to try and take pictures, it was 40 degrees Celsius (104F) which was ridiculous. So here I am cowering in the shade to take pics to share with you all!

IMG_1080

Enough whinging and onto the sewing stuff. The pattern is Colette's Sorbetto able for free download, thank you again Colette for this winning pattern!

This time around I cut a size 6 in the shoulders grading to a size 10 on the bust and size 12 through the hips and I am much happier with the fit.  I also added about 1.5" to the hem and curved it up at the sides to give a nicer look when worn out over pants.

IMG_1072

I started out by making the bias binding using Colette's continuous bias tape tutorial.  IMHO this is way faster than the individual strip method if you want to end up with a large amount of bias. I started with a pretty big square of fabric so ended up with heaps of lovely bias, enough for this top and something else in the future.

IMG_1071

You will see above that I used the pin method to fold my tape.  I set up two pins just wider than the iron and fed the folded bias through them I then lay the iron between the pins and just guided the fabric through using both hands as the iron just lay there.  Nice and quick and a good result too.

IMG_1106

The other addition I made was to add a trim just under the pleat on the front. I sewed this under the pleat but left the pleat so it was not sewed down as I didn't want it to have the top stitched look.

The fabric is from my Black Friday haul that I ordered in from fabric.com. A cotton called Mackinaw Island for Benartex according to the selvage. The main thing for me is that it is nice and cool to wear, especially with this crazy heat wave we seem to be having. 

IMG_1086

My biggest problem with this heat is getting into my sewing room, it is like a sauna as it is upstairs and I guess closer to the roof space. I have an aircon unit, but it blows my sewing all over the place!  Might have to relocate for a bit I think.

By the way, the bush I am standing in front of is a Hibiscus, isn't the flower pretty and a stunning colour?
IMG_1118

Wednesday 12 December 2012

Gap-tastic Cowl for Summer!

Last week I had an overwhelming urge to make the GAP-tastic Cowl (Ravelry notes here)I have had it in my queue for ages and knowing I was going to spend a week in the ice rink (judging the Australian National Figure Skating Championships), I decided I simply had to have it NOW!

IMG_1050

My only problem was time. I really didn't end up with as much time as I thought to finish it, so a 4 days after Nationals finished I finished the cowl. Timing huh?

IMG_1056

I used a Cascade 128 Superwash from Tangled Yarns in Brisbane and knitted on size 9mm needles. This wool is soft, warm and great to knit up, the colour is a darkish duck egg called Summer Sky Heather.  

IMG_1058

Do you like how well the cowl goes with my Hazel?  Hehe.  Hopefully I will be going to Europe in March so will be able to wear it then.

The only changes I made to the pattern was my finished width was 12" instead of the pattern's 15". I found that 12" was plenty and much more would have made it too chunky for my neck.  The bonus with the lesser width was less wool, I used just over two skeins, but two would have been fine. I bought four skeins with the view to making a matching hat or wristwarmers, or both.

IMG_1070

I love how it can be a hat too - this is soooo toasty and warm, I am looking forward to trying it out in a more appropriate climate!!   Anyone got any good recommendations for hat or wristwarmers that use this weight wool??

Now to get back to my other project, the Lorna Suzanne cardi - gee 5mm needles feel small now :)

Monday 10 December 2012

Project CPR


This project by Liz of zilredloh prompted me to have a serious think about my accumulating pile of items that need mending or altering.  It seems whenever something of mine has a fault, I chuck it in a pile to be forgotten for ages!

IMG_1036

IMG_1033

I have two piles, one more obvious than the other, one languishes on my dressform, the other normally stuffed into a shelf (outta sight, outta mind right??).

IMG_1037
Setting aside an hour on Sunday morning, I decided to start with a silk top that had developed a hole in the back and hasn't been worn since.

The hole was not super straightforward to mend as the fabric had actually come away at the seam. But lo and behold a few minutes later it was unpicked, sewed back up again and rebound. Job done and in only about 15 minutes! No idea why I didn't do this earlier.

IMG_1038

Next on the agenda was my Hazel dress that needed taking in a the waist. I had started unpicking, but given it had been serged, I had gotten lazy and cast it aside.

IMG_1039

Check out that bloody great hole - I have had many an occasion when I have wanted to wear this dress but obviously can't with the skirt half off!

I finished unpicking, tedious, I hate unpicking and why wasn't I more critical when I made it and before serging the seams? Anyway, I unpicked, took in the seams, reset the pleats, sewed the skirt back on and hand stitched the lining down. Phew! After a little more than 45 minutes the dress was finished and I wore it out to lunch.

IMG_1040

It felt so good to have two things off the pile, I just need to set aside some time this weekend to wipe out a couple more. Thanks for the motivation Liz, just what I needed!!

Anyone else participating in the Project CPR?

Friday 7 December 2012

Vintage Vogue 5557 - Red Sheath Dress

Meet my latest vintage creation, the Vintage Vogue 5557 sheath dress.

IMG_0979
 
I think this can be described as a sheath dress, VintagePatternsWiki describes it as a one piece dress but given the simple lines it is certainly close to a sheath.

IMG_0989

I bought this pattern a little while ago as one of many from a local seller who was selling off his mother's patterns from when she was a seamstress. One of the reasons I was most excited about getting these patterns was that they were all used, showing they were a real part of fashion of the era. This particular pattern is dated to June/July 1963.
 
Click image for source
When I removed the pattern from the envelope, I could see there were pins in it already from the last time it was used. On measuring the pieces, it was like it was altered for me!  Check out the old pins:
 
IMG_0750

The pieces were all shortened (perfectly) and had been narrowed across the back.  For me these are two of my standard alterations.  The only thing left me to alter was to "grade" it up to my size.  When I say grade, I mean just add a bit to the side seams, after all it didn't need much altering as most of it had already been done!

IMG_0993

SHHH, DON'T TELL:
The dress has a fake pleat/wrap with fake button closure.  It has bound buttonholes, which are completely wasted as they are covered from view with the buttons that are sewed over the top of them. The buttonholes are real on the very top layer, but underneath there isn't a hole at all! The dress is actually closed with a side zip.
 
IMG_1031
 
Other than the fact I love this dress, I also made the whole dress from my stash - so really it was free right??

IMG_0976

What did I change?
- Not much actually
- The dress is supposed to have facings, but I am not a fan of how they seldom stay where they should so I fully lined the bodice with a remnant of cotton from a previous project.
- the grading previously mentioned
- I swapped the normal zipper for an invisible zipper
- I cut the belt in two pieces as I didn't have enough fabric, I also didn't cut it on the bias

IMG_1026

The dress went together pretty well and not much fiddling with the fit was required.  The only big difference with the fit was that the pattern envelope indicates it is more blousey at the bodice, I prefer a little more fitted which is good as that is how it ended up!!

IMG_1025

I love vintage instructions, the diagrams are brilliant.

Ok, now for the weird bit.  According to the instructions, the belt doubles as a scarf:
IMG_1024

Now I don't know about you, but there is no way my waist is close to my neck size.  I tried it to see how it would look, but am really not a fan.

IMG_1010

Hmmm...where is my neck? Not a good look, and where is my waist?  Not loving it.
 
IMG_1011
Still trying.

IMG_1013
Nope I give up, I'm keeping the belt.
IMG_0974

I have already worn this to a couple of functions, so another wardrobe winner, and great for the festive season.

Tuesday 27 November 2012

Kelly Skirt AKA the Shorts that Weren't...and a Sorbetto

Originally I had planned to make some capris next as per my Spring/Summer Plan however for some crazy reason when I bought the fabric thought I could get long shorts out of one and a quarter yards. What was I thinking? The fabric is only 44" wide....unless I was going to make hotpants.... nah, never going to happen.

No matter which way I tried to manipulate the shorts pattern it just wasn't going to work. So onto plan B - a skirt, the Kelly Skirt to be precise.  It seems I was very slow catching onto the Megan Nielsen patterns, but I am now converted having recently completed two Banksias blogged here and here.

IMG_0948

The pattern was a dream to sew up and miraculously I made no adjustments.

IMG_0956

Ok, well I didn't cut the waistband in one piece as prescribed, I didn't have enough fabric for that, so I cut in in three pieces, one back piece and two fronts, as the seam allowances all line up it looks like it was supposed to be that way.

IMG_0961

The side seams and waistband are all topstitched which I think has given a more professional finish.

IMG_0930

To remove bulk and add some fun, I lined the pockets with fabric left over from a previous Banksia. 
 
IMG_0919
 
Not being able to find buttons that I was happy with I went with covered buttons.
 
Initially I wasn't sure I would like the pleats and thought they might stick out weirdly, but they don't and I think the silhouette is actually quite flattering - look, I have a waist!
 
IMG_0920
 
For the observant Colette fans you may recognise the top pattern, it is the ubiquitous Sorbetto not previously blogged.  This is my only Sorbetto so far as I found it a bit boxy but it works really well tucked into this skirt.
IMG_0923

Interestingly I was on Twitter tonight and saw the link to a news article where some researchers have worked out mathematically the perfect skirt length to make your legs look fantastic.  Now I never considered there would be an equation for this, surely it depends on the occasion and one length is not for all styles or events?  However, curiosity got the better of me and coincidentally this skirt turns out to be my perfect length!  (84cm from my shoulders if you are interested)

IMG_0906
 
In reality it is actually this length because it is the length of the original pattern piece and I didn't have enough fabric to make it longer!! But I am pretty happy that I didn't make it longer.
 
IMG_0933
 
I expect I may be making more of these - when I bought this fabric, I also bought two other pieces in different colouts with the intetion to make several shorts, but of course that fabric is too short too - DUH!  Guess my summer wardrobe will be skirt based, not shorts!
 
Does anyone else make stupid mistakes like me, buying the wrong amount of fabric for a specific project and then having to revert to a plan B??